|
Cordage and knots
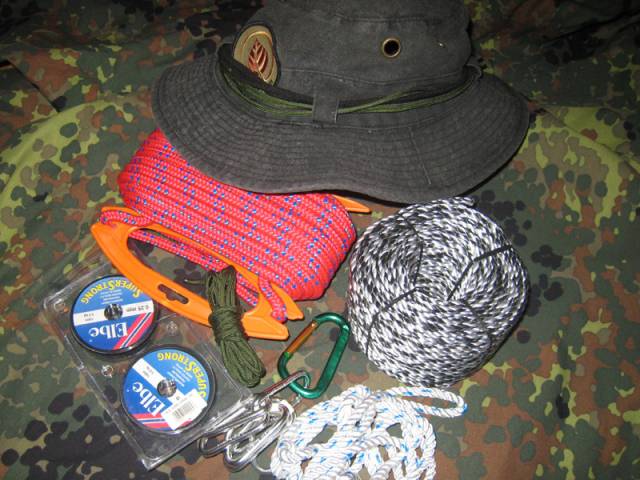
One of the most important items in the woods is cord or rope. With it you can hang up your tarp, construct shelters, and make traps, snares, bowstrings and a lot of other chores.
The easiest is to take the cord with you in your pack. I usually have 15 metres of paracord and a roll of nylon cord with me.
But depending on the sort of trip you are out on, you must decide what type of cord or rope you will bring along.
I don`t climb mountains, but if you plan to do it you obviously pack ropes suitable for the task.
When out in a canoe I pack 30 meters of 8mm nylon rope. This is on top of the 6 meter painters I already have attached to it. I have yet to use it (I`ve only had the canoe a short while), but it will come in handy if I have to line the canoe.
However if you are in a situation without any cord, don’t despair, there are suitable natural material for making cord and to use as lashings.
Sinew
One of the traditional materials for making cord, either to sew clothes or making a bowstring is sinew, animal tendons. Tendons are taken from an animals back or leg. I mostly use leg tendons from moose as I hunt moose myself. When the tendon is loose from the animal, hang it to dry from a branch or anywhere away from rain and moist. It is smart to scrape the tendons to rinse them of fat and other gunk, but I usually don’t bother.
When the tendon is dry, pound it with a wooden baton to loosen the fibre. When the whole tendon is broken down into fibre it is time to make string from it or you can store it as is. I usually store it as is and make string or use it as binding whenever I need it. When fastening an arrowhead just use the sinew as it is. Moisten it in your mouth and lash it around the shaft. When it dries it shrinks and makes a tight lashing. I mostly use it with a little hide glue. I believe it becomes a little stronger and won’t unravel.
Cordage from sinew will be affected by wet weather.
Stinging nettle
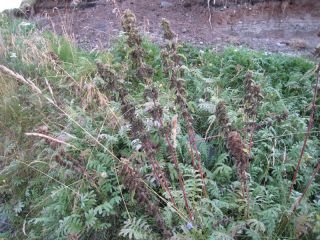
Stinging nettle is also an excellent source of material for making string. Nettle could be used green, as is, or processed to make a stronger, more lasting tread.
I usually just use it green.
Rip up the stalk and take off the leaves. I just tend to slide my hand up the stalk in one firm sweep, removing the leaves. Never mind the itching, it will pass quickly.
I then crush the stalk between my fingertips and remove the inner pith leaving just the outer fibre.
These fibres are then sorted after length and laid together for added thickness if needed.
Then twist it to two ply cordage.
Leather
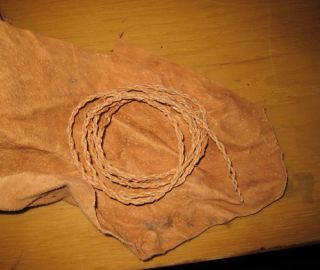
Another part of the animal that can be used as cord is the hide. Just cut a length of the hide with the knife and use it. Rawhide shrinks like sinew making solid, good lashing.
You could also braid or twist the leather cords making a two or three ply rope. The picture above is a two ply rope made from bark tanned reindeer hide.
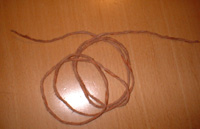
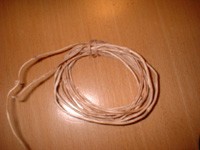
But there is nothing wrong in using chromium tanned leather to make string if that is what you have, picture below.
Tree bark
Another material suitable for making cord is tree bark. The inner bark of Willow works fine and is abundant in my part of the woods. The bark is harvested in spring and summer as it peels off very easy then. Collect the bark from a straight stick free from branches.
The finer cord is made from saplings but heavier cord could be made from a stick about 4-6 cm in diameter. Scrape of the outer brown/green bark leaving only the light inner bark. It is important that you scrape off all the outer bark or the string will get brittle and brake when it dries. Use the inner bark to make cord or use it as it is. You may however process it further if you like.
The bark rope (willow) above was used to lash my jacket to my ruck. The rope was so strong that I laid it over a branch and hauled myself up the tree. Unfortunately I had not scraped away all of the outer bark and the rope became brittle and broke the next day. But it worked as long as I needed it.
Boil the inner bark strips in water and wood ash. Let it simmer for about 45-60 minutes, take it out and hang to dry. The bark is now brown in color. The bark is suposed to get more flexible and durable when doing this, but I must admit I’ve never tried it. I use it as described above.
The inner bark from Juniper (juniper commuensis) is also a good material for making string. I believe the saamis used Juniper for string. This material needs no treatment. The bark does not become brittle and will make a good, strong string. It is a little stiff though. The string is in my opinion far better than one from willow bark.
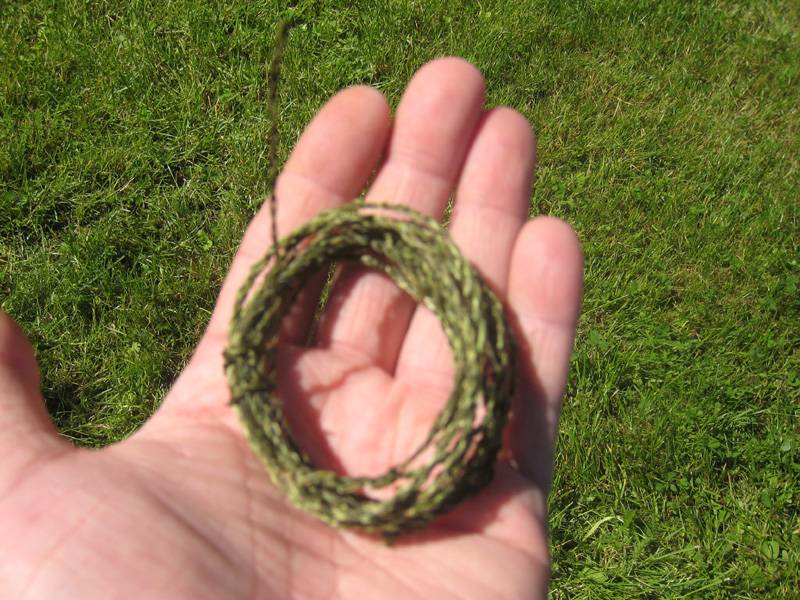
Twisting the cordage
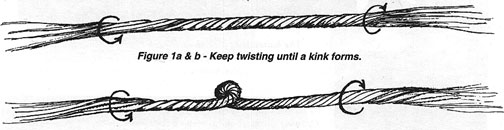
When you have gathered the materials it is time to making the cordage. To do this you begin with a small amount of fibres (depends on how thick you want the string), twisting the fibres in clockwise direction until it forms a kink. It is wise to let the kink form away from the middle of the fibre bundle (like in the pic below), as the splicing of another fibre bundle is a little offset from the other side. This makes the splice a little stronger.
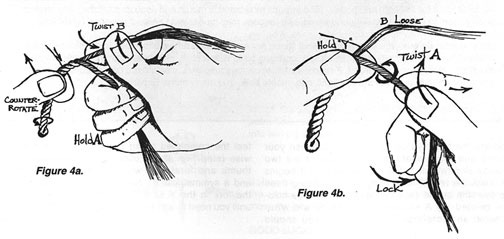
Twist each fibre bundle in the same direction as before using your right hand fingers. Your left hand holds the ready string (the kink) securely. When you have twisted the two fibre bundles about an inch one loosen the left hand grip letting the fibre bundles twist together. It may be necessary to aid this twist with the left hand to get it right. Continue this until you have the amount of string you need. When the fibres run out just add another fibre bundle of the same thickness. See picture below for additional explanation.
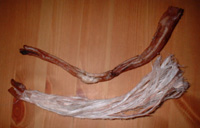
Cordage from tree roots
Roots are also good as binding materials. Roots taken from Spruce and Birch are good.
It is said that roots from wet areas (marshland) is the best.
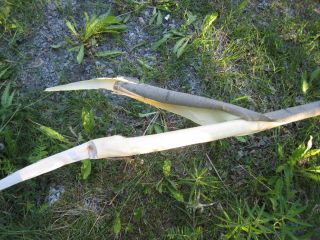
Collect roots from around a tree with few branches. The above tree reflects the roots. Many branches on the tree, and there are many "branches" on the roots.
Dig them up with a digging stick. Try to get them as long as possible. Scrape off the bark with the back side of your knife. If the roots are thick you may split them to get the thickness you need. The roots can be used right away or dried and stored. When you are going to use them just toss them in warm water until they sink and they are ready for use.
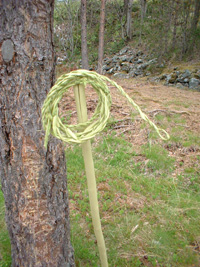
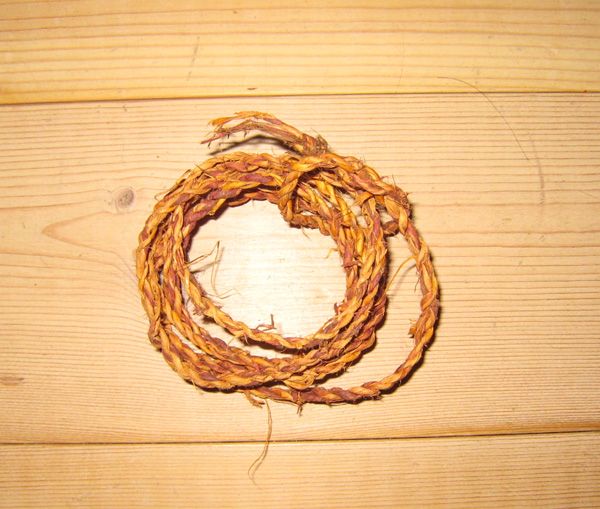
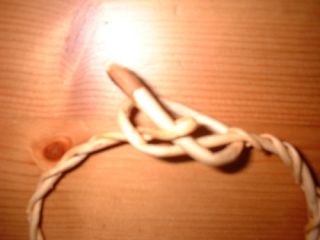
One of the uses for tree roots is a "vidjespenning". A sort of old time karabiner. They where traditionally made from withies, but I use to make them from roots. The traditional way to make them is to twist the sapling, breaking the fibres, double them and let them twist together like a rope.
Below are some pictures of one I’ve made from a birch root. It is small, about 10 cm in diameter, and I’ve used it to lock up a cupboard when my daughter was constantly hauling out the contents of it.
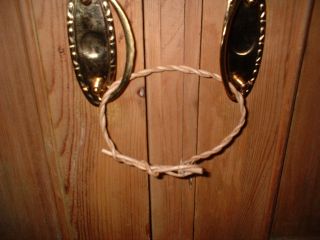
I don’t have any pictures of the making of it but I hope the pictures are explaining a little bit of how to do this. The second picture shows how the
lock works.
Some knots that I use
I don’t use a lot of different knots as I find no need for it. In my opinion it is better to see what knots that could be useful (your own experience) and learn these well instead of trying to remember a lot of fancy knots you don’t use anyway.
Reef knot:A good knot for joining two ropes of same thickness, or making a loop (tying together a blanket roll).
This knot is however not suited for joining ropes when climbing. It is not strong enough.
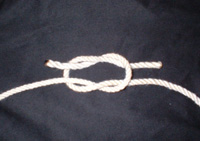
This knot was earlier used for tying the “rĺseil” (square sail) to the “rĺstokk” (the yard).
Bowline knot:A quickly tied knot that makes a loop that will not tighten under strain. Use whenever a fixed loop is needed.
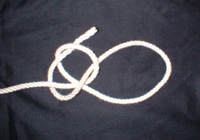
The knot could easily be untied. I use this knot for attaching guy lines to my tarp and tent or to make loops for tent pegs.
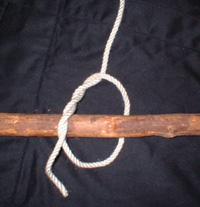
Timber hitch:Useful as an anchor knot or securing the bowstrings non-loop end to the bow. Used as a start knot for lashings.
Prussic knot: The prussic knot is a friction knot. A loop is fastened to another rope forming a loop that runs freely when not under stress and jams when putting weight on it.
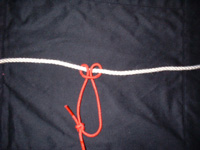
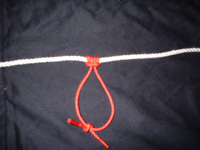
The rope forming the loop must be of smaller diameter than the main rope.
It is a knot mostly used by climbers, but I use it to tighten up my tarp. Use more wrappings than I’ve done on the picture above.
Truckers hitch: I use this knot to secure my canoe ends to the car. The force of this knot is that it is easy to tighten (works like a pulley) the rope for a secure tie down.
|